Eliminating Distractions with Pfsense
I. Introduction
In an age of unlimited amounts of potential distractions, staying focused and productive has become increasingly hard. Every possible engaging and distracting website is just a click away.
Today we will be looking at Pfsense, and in particular three tools at its disposal: Aliases, scheduling, and Rules.
This blog post will walk you through some basics of Pfsense, as well as configuring and using it to prevent distractions and keep you focused.
II. PfSense
Pfsense is a free and opensource firewall software that allows in-depth configuration of your network. Another great feature is the web GUI which allows you to start configuring your firewall easily without needing to research commands or new terminology.
The Pfsense firewall offers three main tools that can be utilized for our goal:
- Aliases: enable you to link multiple devices into a single group for rules to apply to.
- Schedules: allows you to decide when certain Rules are active.
- Rules: used to control access to specified websites.
III. Initial pfSense Setup
Although the process of Installing Pfsense is outside of this guides purview, if you have not yet installed Pfsense I have linked an installation guide below:
https://docs.netgate.com/pfsense/en/latest/install/download-installer-image.html
The three tools we will be using are conveniently found in the firewall tab in your Pfsense web interface:

IV. Aliases
An Alias is a group of hosts, ports, networks, or URLs that can be grouped together and checked by firewall rules.
The alias menu can be found by opening the Firewall dropdown and clicking Aliases.

To create an alias, first click the Add button.
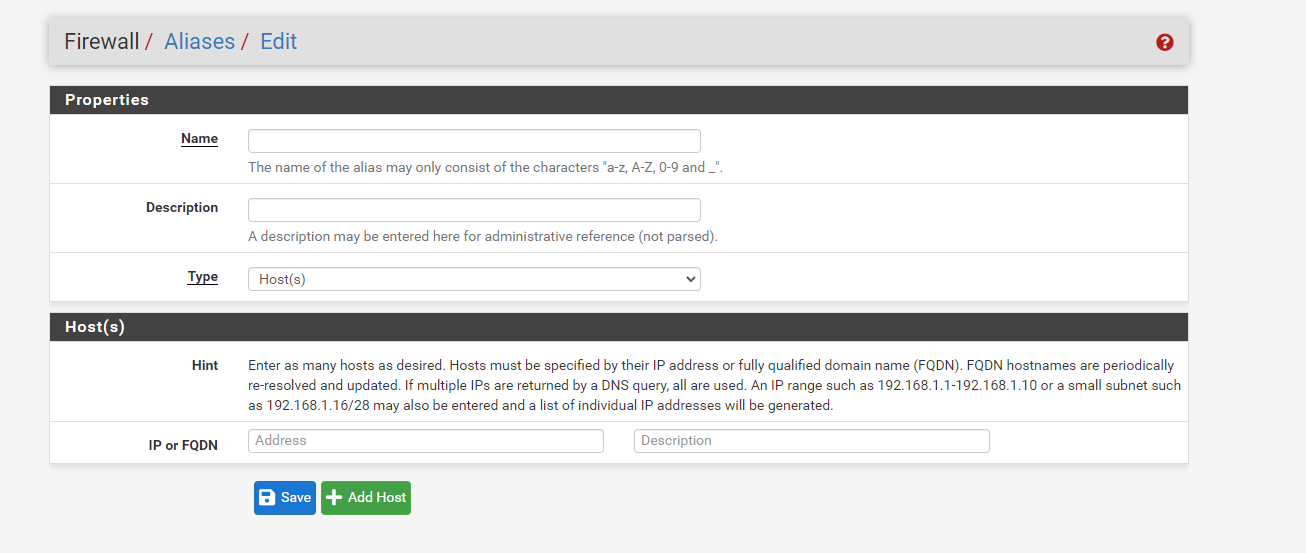
Next, fill out the form, click Save, and you’re done. Super simple!
V. Schedules
Schedules allow you to set time spans during which firewall rules are active. This allows you to create rules that only apply at certain times of the day or only on specific days.
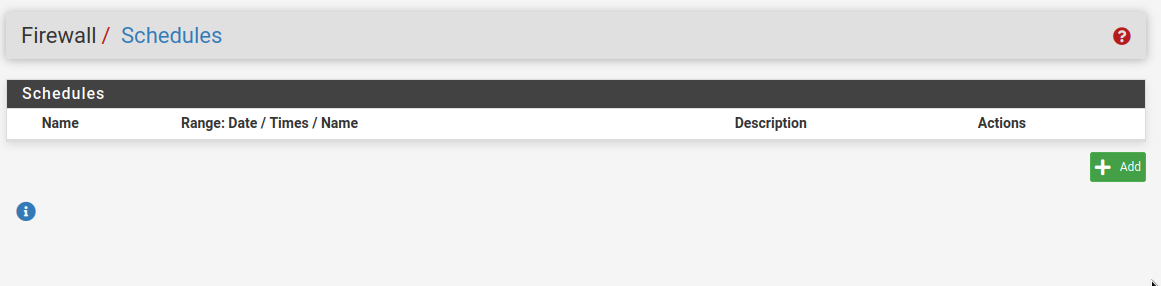
Creating a schedule in Pfsense is a simple process. First navigate to the Firewall drop-down on your Pfsense web interface and click on Schedules:
Now, in the schedules page click on the Add button.
Next you will be greeted with the schedule creation page. You can set a schedule name, description, month, date, and add time spans.
Note: clicking on a cell such as Mon, Tue, Wed, etc… instead of a specific date will select all Mondays, Tuesdays, Wednesdays.
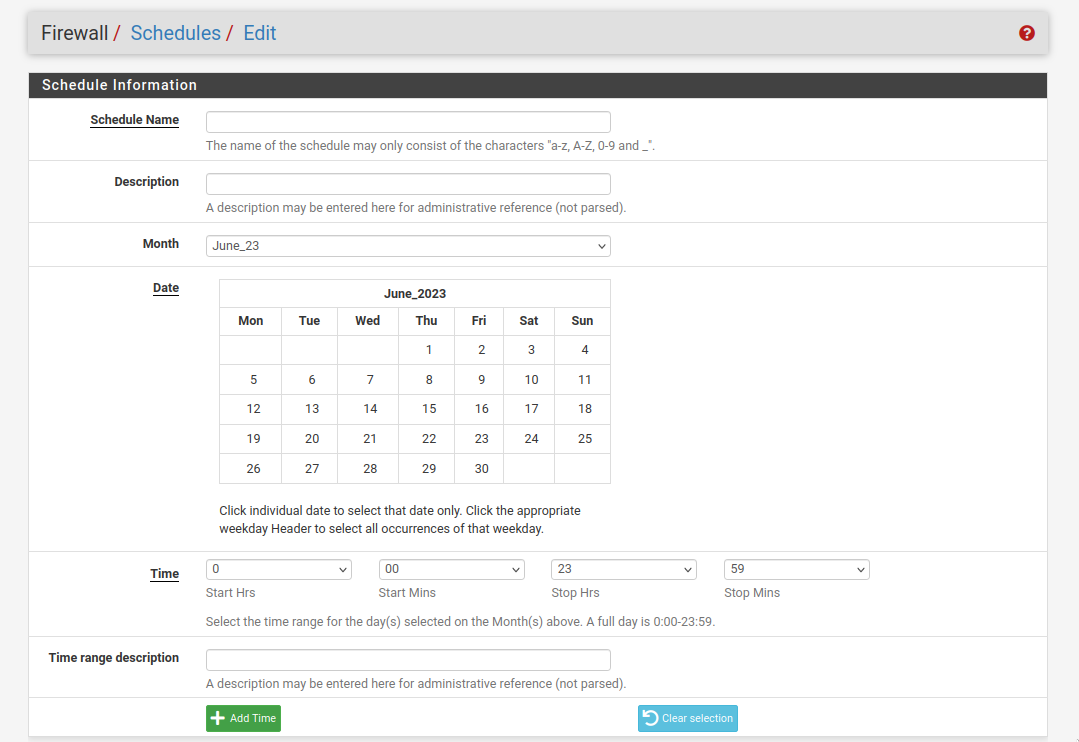
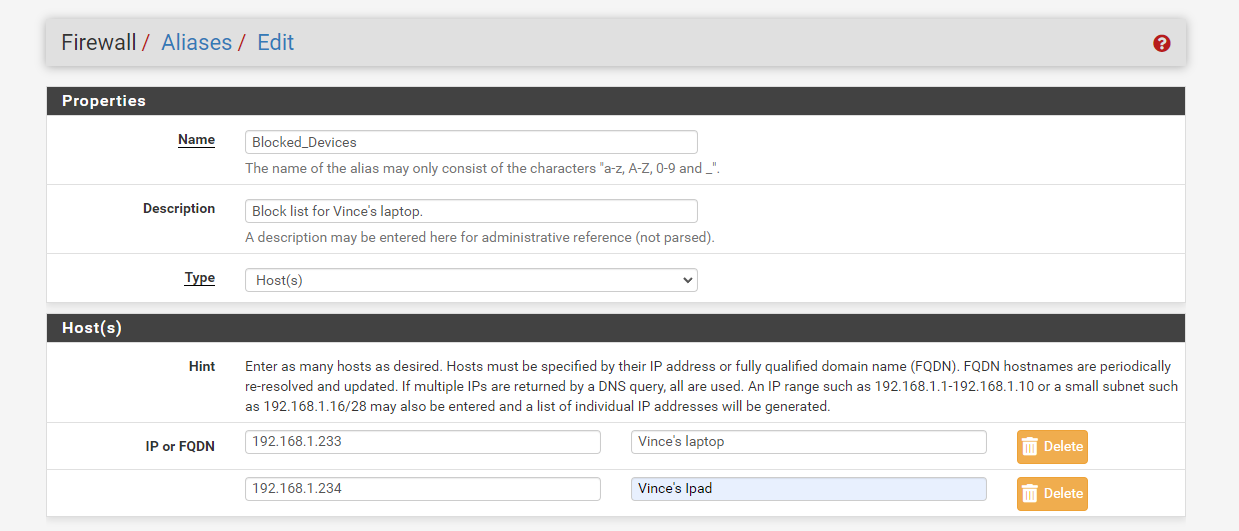
For this example, I made a schedule named ‘Main’ that goes all day every day with a short 2 hour unblocked time span from 2 to 4 PM. Fill out your schedule’s configuration and continue to the next part of this guide.
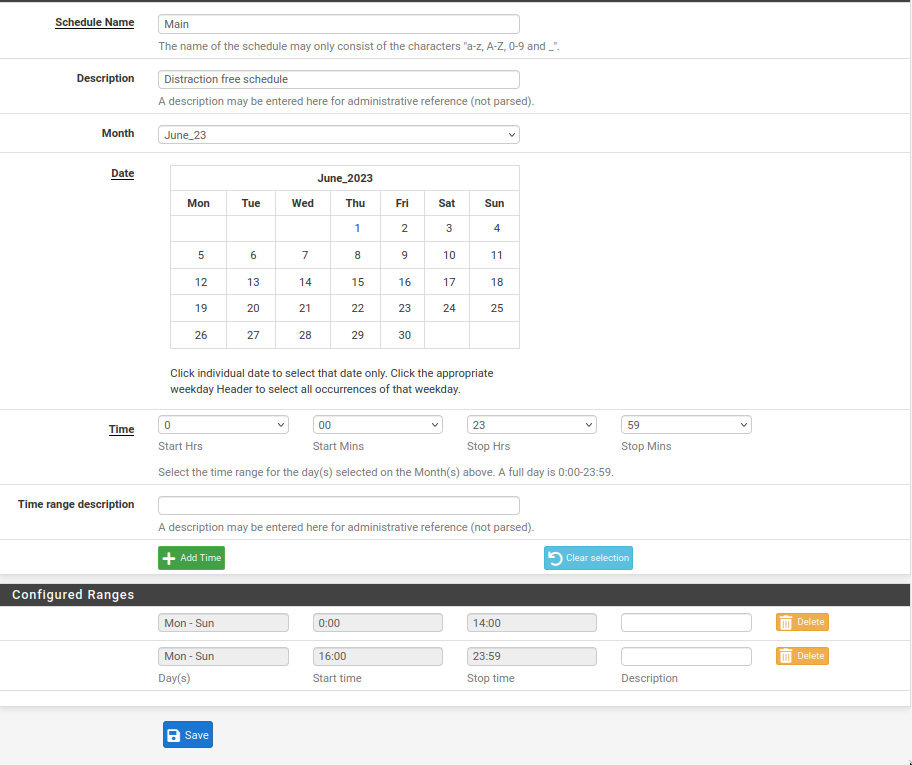
Finally, click Save. You have now finished creating a schedule.
VI. Rules
A firewall rule is a configuration that each packet crossing through your network is checked against. For example, if a packet’s destination is one where you have a rule to block traffic or allow traffic, the packet will be blocked or allowed. An quick aside is that there are many other features of firewall rules(stateless vs stateful, QoS, Protocol specific, and many more) that may be covered in a different blog post, for now we’re just focusing on the rules that pertain to this specific goal.
To access the rules menu, open the Firewall dropdown and then click Rules:
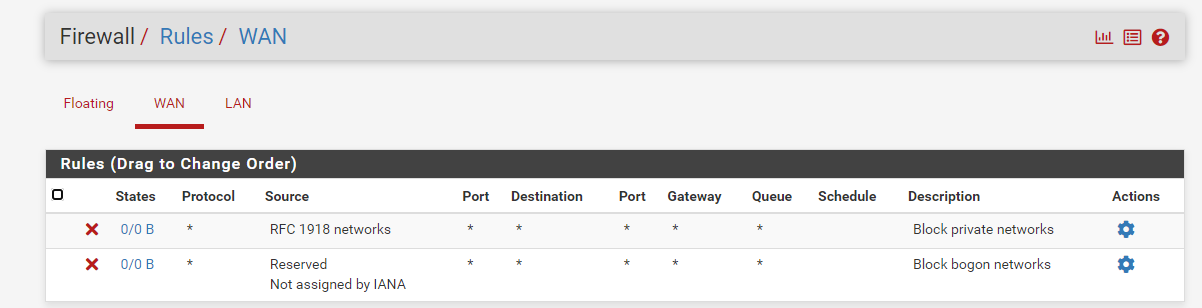
The three rules above are default settings in PfSense, and each has an important function:
- Floating: applies to multiple interfaces and both inbound and outbound traffic, they’re also usually checked before the interface specific rules.
- WAN: applies to packets entering or leaving your network’s WAN interface.
- LAN: for internal network traffic.
Floating rules are good for a broad range of control, whereas WAN and LAN rules are more targeted. For this task we will be using the LAN interface because we want to prevent our local devices from passing through the the firewall and making requests to the internet during the schedule.
To get started, click the LAN interface.
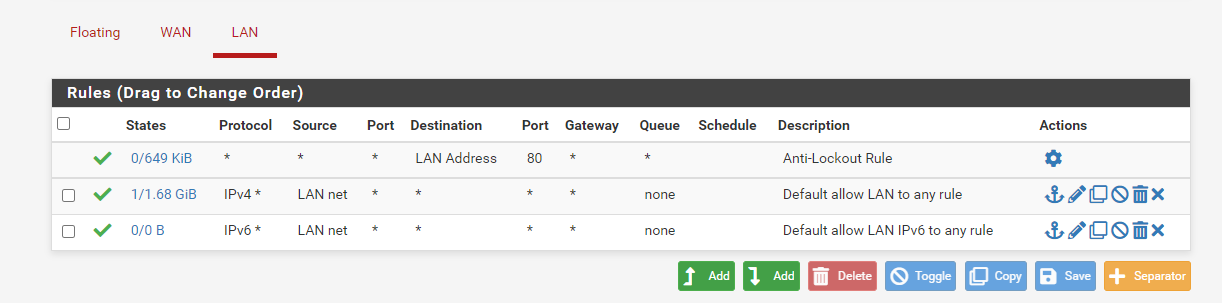
The three rules above are default to Pfsense and each have an important function.
Note: Rules are evaluated from top to bottom. Whichever rule is applicable first is the one that is used.
-
Anti-Lockout Rule: Prevents you from locking yourself out of PfSense.
-
Default allow LAN to any rule (IPv4): Allows all IPv4 devices on your LAN to access any external resources.
-
Default allow LAN IPv6 to any rule: Similary to the previous rule, allows all outgoing IPv6 traffic.
To start creating a block Rule click Add:
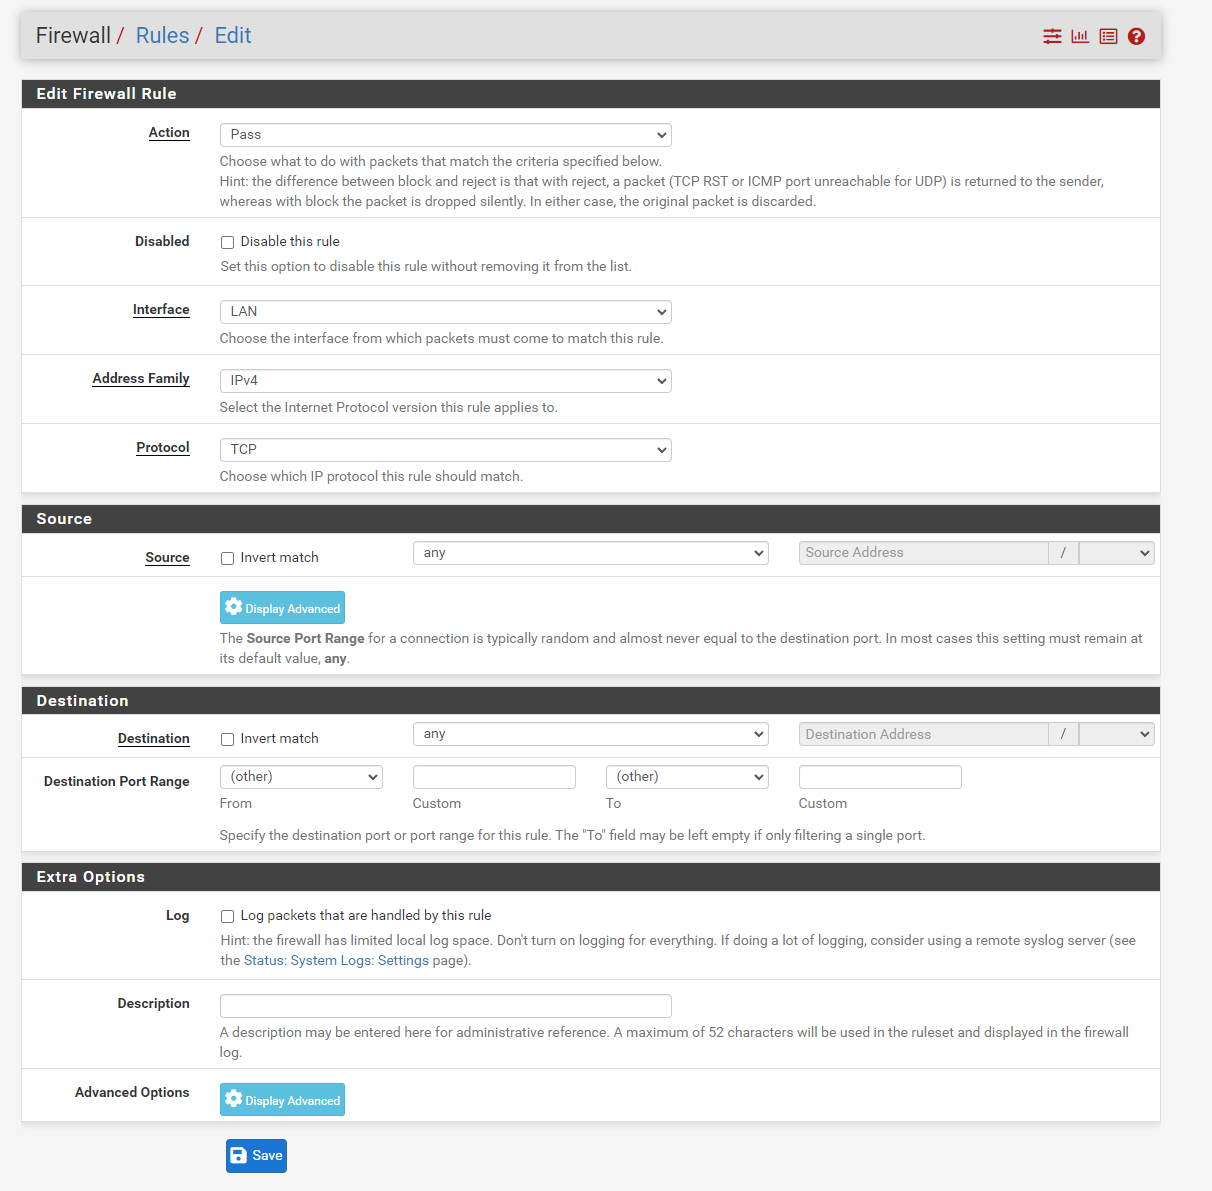
There are a number of steps to finish create your block list, so I will just lay them out below. Click on any step to get a explanation.
- Change Action to ‘Block’. 1
- Change Address Family to ‘IPv4+IPv6’.2
- Change Protocol to to ‘Any’ .3
- Change Source Dropdown to ‘Single host or alias’.4
- Change Source Textbox to the name of the alias you set up previously.
- Click on Display Advanced.
- Scroll down to the bottom and change Schedule to the schedule you previously set up.
- Click Save then Apply Changes.
VII. Testing Your Configuration
Now if your schedule is active your alias defined devices should be unable to access the Internet. Enjoy some distraction free productivity!
If you are experiencing any problems with the above configuration, double check that your schedule is active, that your rule is above the ‘Default Allow’ rules, and that your alias is correct. Also, feel free to shoot me an email vsmall@pnw.edu with any issues. I cannot guarantee a fast response, but I would love to help you resolve any issues.
-
There are three options availble for Action. ‘Block’ Matching packets are discarded, ‘Pass’ Matching packets are passed forward, and ‘Reject’ Matching packets are discarded and a ICMP or TCP response is sent to the client. For this case, either ‘Block’ or ‘Reject’ would work, I prefer ‘Block’ because it is more secure and reduces traffic over the network. ↩︎
-
Setting Address Family to ‘IPv4+IPv6’ is important because websites will sometimes redirect to IPv6 addresses and subsequently not get blocked from the requesting client. ↩︎
-
Having the rule target Any protocol functions as a catch all and completely prevents traffic from the client. Feel free to change it if your requirments are just to block a specific service. ↩︎
-
Because we are trying to prevent the client from making requests, Source was chosen instead of Destination. ↩︎